Bootstrap Textarea Example
Intro
Within the web pages we generate we use the form components to receive several information directly from the visitors and send it back to the web site founder completing several purposes. To execute it effectively-- meaning getting the appropriate replies, the proper questions have to be questioned so we architect out forms form thoroughly, consider all the feasible circumstances and forms of info required and possibly presented.
Yet despite of exactly how accurate we have this, generally there constantly are some scenarios when the info we need from the visitor is somewhat blurry just before it becomes actually presented and has to spread over far more than simply just the standard a single or else a handful of words generally completed the input fields. That is really where the # element arrives-- it is certainly the irreplaceable and only component in which the site visitors have the ability to easily write back a few terms providing a feedback, sharing a reason for their activities or simply just a couple of ideas to perhaps assist us making the services or product the webpage is about much much better. (read this)
Tips on how to work with the Bootstrap textarea:
Inside of newest version of the absolute most well-known responsive framework-- Bootstrap 4 the Bootstrap Textarea Modal feature is fully supported immediately readjusting to the size of the display screen web page becomes presented on.
Developing it is pretty simple - everything you need is a parent wrapper
<div>.form-grouplabel<textarea>for = “ - the textarea ID - "Next we ought to generate the
<textarea>.form-controlfor = ""<label><textarea>rows=" ~ number ~ "<textarea>Because this is certainly a responsive feature by default it spreads the whole size of its parent component.
Even more suggestions
On the opposite-- there are definitely a number of instances you would certainly prefer to reduce the feedback offered within a
<textbox>maxlenght = " ~ some number here ~ "Representations
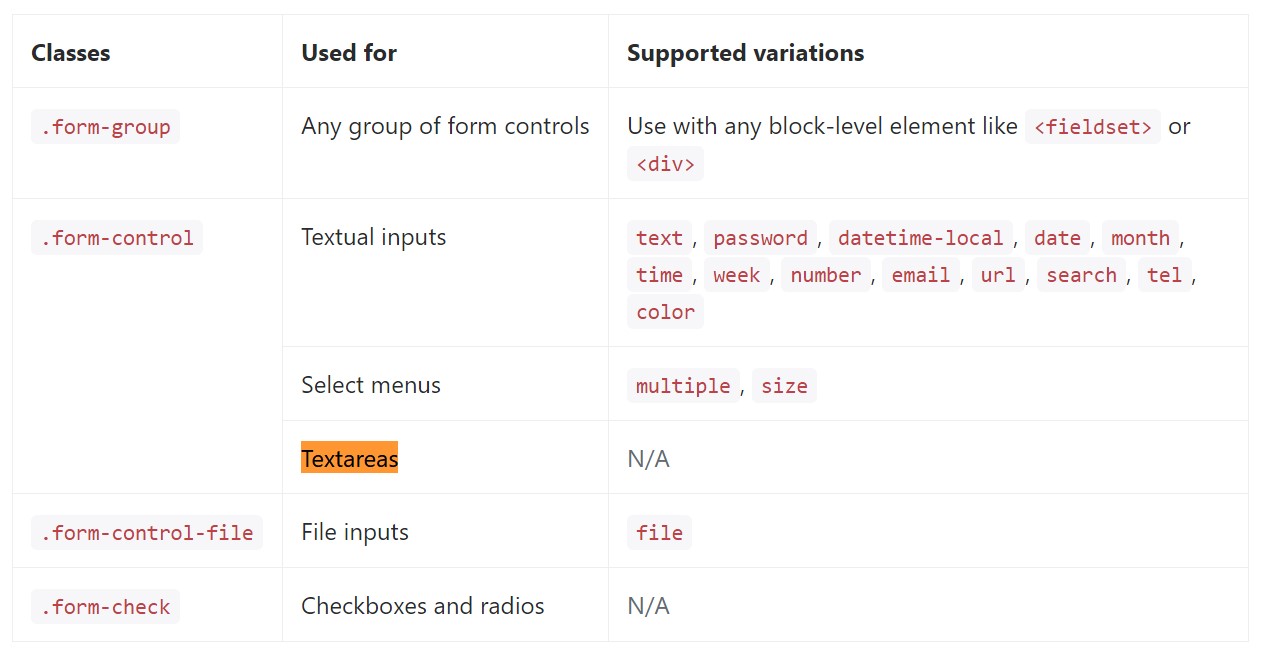
Bootstrap's form manages increase on Rebooted form styles with classes. Utilize these classes to opt inside their modified displays for a even more steady rendering across devices and browsers . The example form listed below demonstrates basic HTML form elements that receive up-dated designs from Bootstrap with added classes.
Keep in mind, considering that Bootstrap employs the HTML5 doctype, all inputs need to have a
type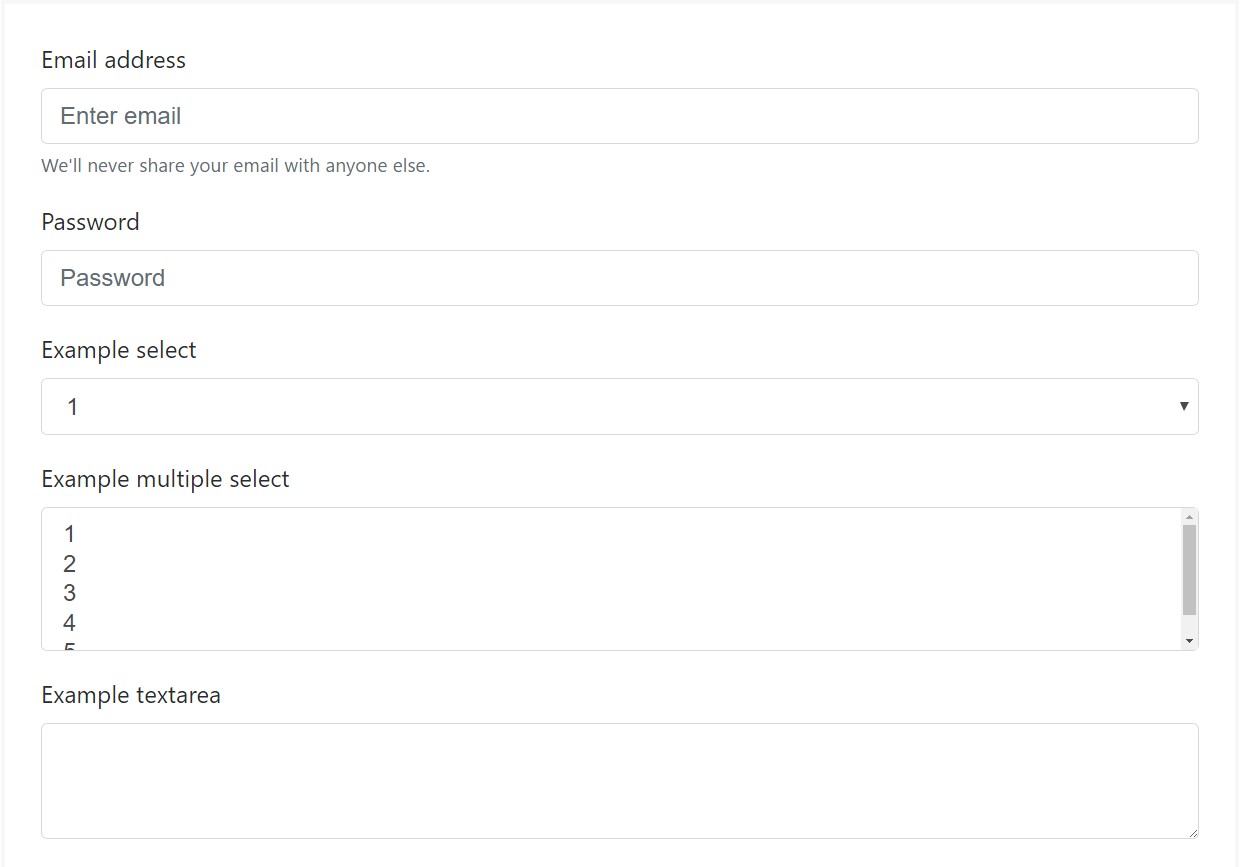
<form>
  <div class="form-group">
    <label for="exampleInputEmail1">Email address</label>
    <input type="email" class="form-control" id="exampleInputEmail1" aria-describedby="emailHelp" placeholder="Enter email">
    <small id="emailHelp" class="form-text text-muted">We'll never share your email with anyone else.</small>
  </div>
  <div class="form-group">
    <label for="exampleInputPassword1">Password</label>
    <input type="password" class="form-control" id="exampleInputPassword1" placeholder="Password">
  </div>
  <div class="form-group">
    <label for="exampleSelect1">Example select</label>
    <select class="form-control" id="exampleSelect1">
      <option>1</option>
      <option>2</option>
      <option>3</option>
      <option>4</option>
      <option>5</option>
    </select>
  </div>
  <div class="form-group">
    <label for="exampleSelect2">Example multiple select</label>
    <select multiple class="form-control" id="exampleSelect2">
      <option>1</option>
      <option>2</option>
      <option>3</option>
      <option>4</option>
      <option>5</option>
    </select>
  </div>
  <div class="form-group">
    <label for="exampleTextarea">Example textarea</label>
    <textarea class="form-control" id="exampleTextarea" rows="3"></textarea>
  </div>
  <div class="form-group">
    <label for="exampleInputFile">File input</label>
    <input type="file" class="form-control-file" id="exampleInputFile" aria-describedby="fileHelp">
    <small id="fileHelp" class="form-text text-muted">This is some placeholder block-level help text for the above input. It's a bit lighter and easily wraps to a new line.</small>
  </div>
  <fieldset class="form-group">
    <legend>Radio buttons</legend>
    <div class="form-check">
      <label class="form-check-label">
        <input type="radio" class="form-check-input" name="optionsRadios" id="optionsRadios1" value="option1" checked>
        Option one is this and that—be sure to include why it's great
      </label>
    </div>
    <div class="form-check">
    <label class="form-check-label">
        <input type="radio" class="form-check-input" name="optionsRadios" id="optionsRadios2" value="option2">
        Option two can be something else and selecting it will deselect option one
      </label>
    </div>
    <div class="form-check disabled">
    <label class="form-check-label">
        <input type="radio" class="form-check-input" name="optionsRadios" id="optionsRadios3" value="option3" disabled>
        Option three is disabled
      </label>
    </div>
  </fieldset>
  <div class="form-check">
    <label class="form-check-label">
      <input type="checkbox" class="form-check-input">
      Check me out
    </label>
  </div>
  <button type="submit" class="btn btn-primary">Submit</button>
</form>
Listed below is generally a full list of the particular form controls assisted simply by Bootstrap plus the classes that modify them. Extra documentation is easily available for each group.
Conclusions
And so right now you learn effective ways to create a
<textarea>Check out a number of video clip information about Bootstrap Textarea Value:
Connected topics:
Essentials of the textarea
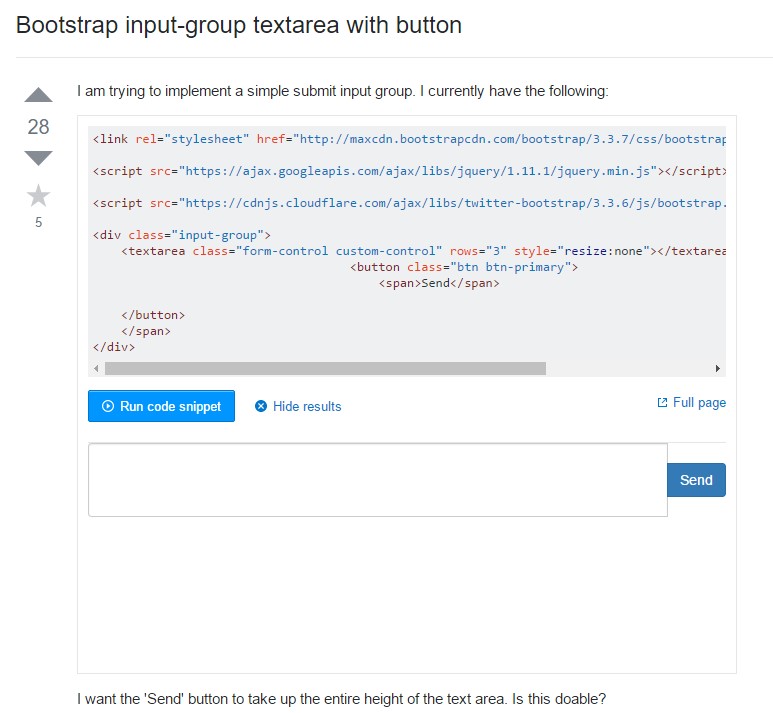
Bootstrap input-group Textarea button by using
Set Textarea size to 100% in Bootstrap modal
